Reversing into a tight space is where a lot of minor damage happens – not on the motorway, not on a long trip, but on the school run, outside the shops, or backing up to a trailer. If you are looking up how to fit parking sensors, the real question is usually this: can you get a clean, reliable result on your own vehicle, or is it better handled by a fitter?
The honest answer is that it depends on the car, the type of sensor kit, and how confident you are with trimming panels, drilling a bumper and working with vehicle electrics. Parking sensors are not especially complicated in principle, but getting them to work properly and look factory-fitted takes care.
How to fit parking sensors without causing problems
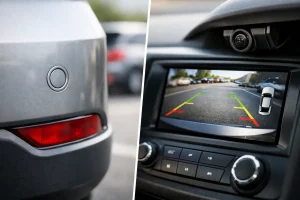
Most aftermarket parking sensor kits follow the same basic layout. You have sensors mounted in the bumper, a control box, a buzzer or display, and a power feed that usually connects into the reverse light circuit so the system activates when reverse gear is selected.
On paper, that sounds straightforward. In practice, the job can become awkward quite quickly. Modern bumpers are curved, wiring routes are not always generous, and one poorly placed hole can leave you with false readings or a finish that never quite looks right. That is why the preparation matters as much as the fitting itself.
Before starting, you need to confirm that the kit suits your vehicle. Some kits are better for plastic bumpers, while others can be affected by metal reinforcement or unusual bumper contours. Sensor angle is another common issue. If the bumper face slopes too far up or down, the sensors may need angled collars to read correctly.
Choosing the right parking sensor kit
There are two broad options – audible-only systems and kits with a visual display. Both can work well. An audible system is simpler and often easier to install neatly. A display can give more feedback, but it means running additional wiring into the cabin and finding a sensible mounting position.
You also need to decide whether you want rear sensors only or front and rear. Rear-only kits are the most common because they are simpler and cheaper to fit. Front sensors add useful protection on larger vehicles and vans, but installation is usually more involved because the system needs a different trigger method rather than simply taking power from the reverse lamp.
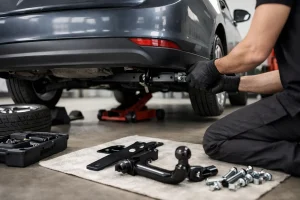
If you are fitting sensors to a vehicle that also tows, make sure the system and mounting positions will not create constant warnings around a towball, step or rear-mounted accessory. This is where a bit of vehicle-specific judgement makes a difference.
What you need before you start
A basic fitting job usually calls for the sensor kit itself, a hole cutter matched to the sensors, trim removal tools, a drill, a multimeter or test lamp, screwdrivers, suitable connectors, insulation materials and cable ties. You may also need access grommets or sealant depending on how the wiring enters the vehicle.
Take the time to read the instructions fully before you touch the bumper. Kits vary. Sensor spacing, minimum height from the ground and the correct orientation of each sensor can differ from one manufacturer to another. Some sensors are directional, and fitting them upside down can cause poor detection.
Marking out the bumper
This is the stage where patience pays off. The sensors need to sit evenly across the bumper and at the correct height. Too low, and they may detect the road surface. Too high, and they can miss lower obstacles. Too close together or too far apart, and coverage suffers.
Most rear kits use four sensors spread across the bumper. Measure from fixed points rather than just estimating by eye. It is worth checking behind the bumper before drilling, especially on vehicles with reinforcement bars, wiring looms or brackets that could interfere with the sensor body.
If the bumper has strong curves near the corners, avoid pushing the outer sensors too far round the side just to maximise width. A badly angled sensor is more trouble than a slightly narrower detection zone.
Drilling and fitting the sensors
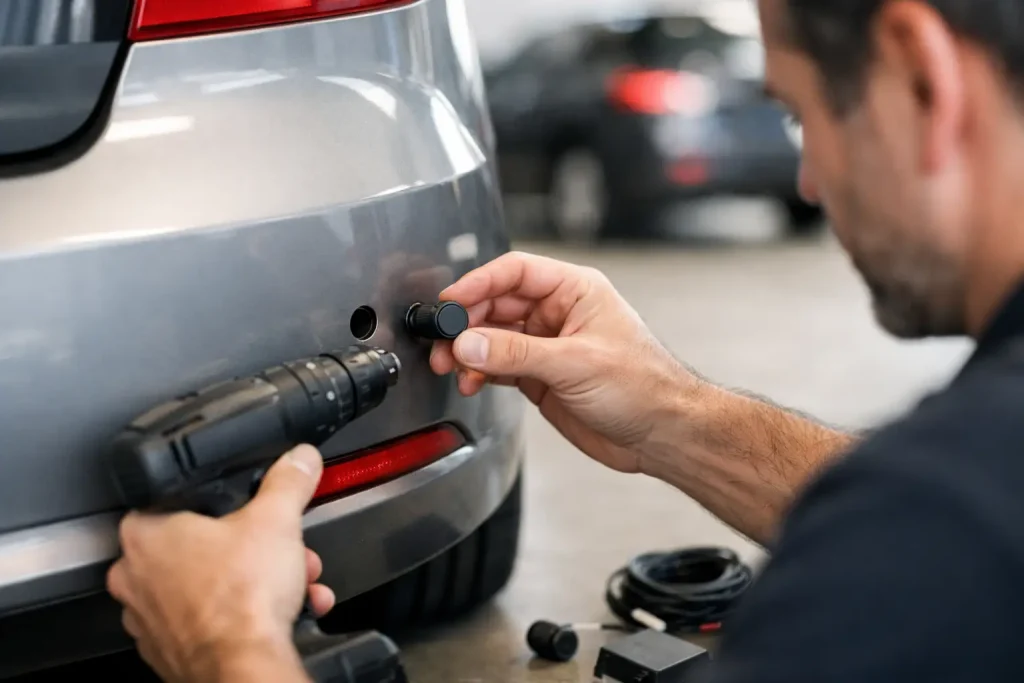
Once you are happy with the markings, drill carefully using the correct hole saw from the kit. Start steadily and support the drill properly so it does not skip across the paint. Clean edges matter, both for appearance and for a secure sensor fit.
After the holes are cut, fit the sensors in the right order and orientation. Many kits label them by position or cable length. Make sure each one clicks in securely and sits flush. If the kit includes rubber seals or alignment collars, use them exactly as specified.
This part sounds simple, but it is often where rushed jobs start to look untidy. Uneven sensor alignment is obvious once the vehicle is back together.
Wiring the system properly
The usual method is to route the sensor cables inside the rear of the vehicle, connect them to the control box, and then take the power supply from the reversing light feed. The buzzer or display is then mounted where it can be heard or seen clearly without becoming intrusive.
Finding the correct reverse feed should always be confirmed with a meter rather than guessed from wire colour alone. Vehicle wiring can vary, even within the same model range. A poor connection here can lead to intermittent faults, warning lights or unreliable operation.
Keep wiring protected and supported throughout. Loose cables inside the bumper or boot area can chafe, rattle or get trapped behind trim. Any point where wiring passes through a panel should be sealed properly to stop water ingress.
On some vehicles, especially newer ones with more complex electrical systems, a simple splice into the reverse circuit is not always the best approach. Sensitive electronics, bulb monitoring systems and limited access can make the job less straightforward than older cars. That is often the point where professional fitting becomes the sensible option.
Testing before refitting trims
Before you put everything back together, test the system fully. Engage reverse with the ignition on and confirm that the unit powers up correctly. Then check each sensor individually using a suitable object, moving it gradually towards the bumper.
You are listening for consistent activation and making sure one sensor is not dead, overly sensitive or reading the ground. If there is a display, confirm that distance readings behave sensibly across the full width of the vehicle.
Do this before refitting trims, boot linings or bumper fixings. If there is a problem, it is far easier to correct it now than after everything is back in place.
Common mistakes when fitting parking sensors
The biggest mistake is treating every vehicle the same. Bumper shape, sensor height, towbar position and wiring access all affect the result. What works neatly on one hatchback may be awkward on an SUV or van.
Another common issue is poor hole placement. Once drilled, there is no easy undo button. Sensors that are too low, too close to a crease line or fitted into heavily curved sections can trigger false alarms or leave blind spots.
Wiring shortcuts are another problem. Scotch-lock type connectors, poorly insulated joins and unsecured cables might get the system working on day one, but they are often behind faults later on. Moisture and vibration are not kind to untidy installations.
Then there is compatibility. If the vehicle already has parking assistance, towing electrics or other aftermarket electrical equipment, the fitting needs a bit more thought to avoid conflicts and nuisance beeping.
When it is better to have parking sensors professionally fitted
If you are confident with careful measuring, drilling and basic auto electrics, a straightforward rear sensor kit can be a reasonable DIY job. But there is a clear difference between making a system work and fitting it to a standard that looks right and stays reliable.
Professional fitting is often the better route if your vehicle has complex electrics, limited access behind the bumper, existing towbar wiring, or if you simply do not want to risk drilling painted bodywork. A workshop that handles parking sensors regularly will know where problems usually arise and how to avoid them.
That matters even more for working vans, family cars and towing vehicles where reliability is the whole point. A sensor system should help you manoeuvre with confidence, not create constant false warnings or leave you wondering whether it will work in the rain.
At Doncaster Towbars, parking sensor fitting is part of the same practical, vehicle-focused approach we bring to towbars, electrics and other workshop installations. The aim is straightforward – fit the right system, fit it neatly, and make sure it works as it should on your vehicle.
How to fit parking sensors and get a factory-style finish
A tidy result comes from the small details. Accurate marking, correct sensor spacing, proper cable routing and secure electrical connections all make the difference. On some vehicles, colour-coded sensors also help the finished job blend in rather than stand out.
If you are doing it yourself, take your time and do not force anything. If something does not look right during measuring or testing, stop and correct it before moving on. Parking sensors are there to make everyday driving easier, and the fitting should reflect that same principle – careful work now saves hassle later.
If you are unsure at any stage, getting advice before drilling the bumper is usually the wisest move.