A dashcam only helps if it captures the right view, stays powered and does not interfere with the way you drive. That is why knowing how to install a dashcam properly matters just as much as choosing the camera itself. A quick stick-on job can work, but poor placement, loose wiring or the wrong power setup often causes more frustration than protection.
For most drivers, the aim is simple. You want clear footage, a neat finish and a system that works every time you start the car. If you use your vehicle for commuting, towing, trade work or long motorway miles, a reliable installation gives you one less thing to worry about.
How to install a dashcam without causing problems
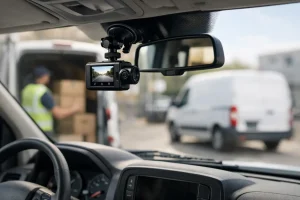
The first decision is where the camera should sit. In most vehicles, the best place is high on the windscreen, usually behind or close to the rear-view mirror on the passenger side of the central area. That position keeps the camera within the sweep of the wipers, gives a balanced road view and helps keep it out of your direct line of sight.
Placement is not just about convenience. If the camera is too low, it can obstruct your view and may not comply with legal expectations around windscreen obstructions. If it is too far over, the footage may miss part of the road. On some vehicles with driver assistance systems, rain sensors or heated screen elements, space is tighter, so the exact location needs a bit more care.
Before fixing anything permanently, sit in the driver’s seat and check the view from both inside and outside the vehicle. The camera should not block your vision at junctions or roundabouts. It also needs a clear forward view that is not heavily shaded by dotted windscreen tinting.
Choosing between plug-in and hardwired fitting
If you are looking at how to install a dashcam, the next question is power. Most units can be fitted either by plugging into a 12V socket or by hardwiring into the vehicle’s fuse box.
A plug-in setup is usually the quickest route. It suits drivers who want a simple installation with minimal work, and it can be ideal if you swap vehicles regularly. The trade-off is that you will often have a visible cable run, and the 12V socket stays occupied.
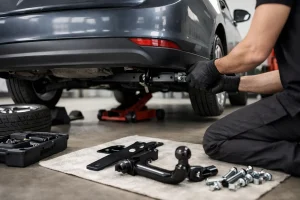
Hardwiring gives a cleaner finish and is usually the better option if you want parking mode, automatic recording and a more factory-style result. It also reduces the chance of cables being tugged or knocked loose. The downside is that it needs the right fuse tap, proper circuit identification and care around modern vehicle electrics.
Neither option is always right for everyone. A family hatchback used for school runs may be fine with a plug-in unit. A van, tow vehicle or work car that spends time parked on sites or at kerbsides often benefits from hardwiring.
What you need before you start
Most dashcam kits are fairly straightforward, but the details matter. You will normally need the dashcam, its power cable, the windscreen mount, a trim tool and cleaning wipes for the glass. If you are hardwiring, you will also need the correct hardwire kit, suitable fuse taps and a way to identify switched and permanent live circuits safely.
It is worth checking the camera’s memory card requirements before installation as well. Some dashcams are fussy about card type, speed and capacity. A poor-quality card can cause recording failures that look like fitting faults.
Clean the inside of the windscreen properly before mounting the camera. Grease, polish residue and dust can all weaken the adhesive pad. If the screen is cold, let the car warm slightly first, because adhesives tend to bond better when the glass is not freezing.
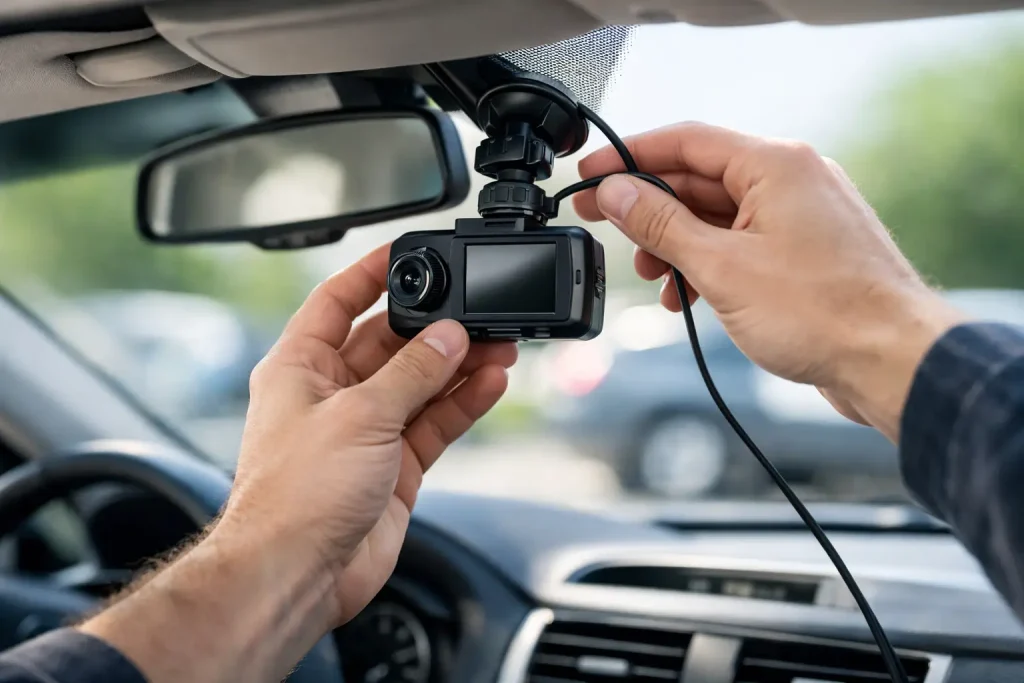
Fitting the front dashcam
Once you are happy with the position, attach the mount and let it bond properly if it uses adhesive. Do not rush this part. If the pad lifts later, the camera angle will shift and the recording may become useless.
Next, connect the power lead and plan the cable route before pushing anything behind trim. The usual path runs from the camera across the top of the windscreen, down the A-pillar and towards the power source. In many cars, this can be done neatly by tucking the cable behind interior trim edges.
This is where a lot of DIY installations go wrong. You should never force trim panels or push cables into areas where airbags may deploy. Many A-pillars contain curtain airbag components, and trapping a cable in the wrong place can create a safety issue. If you are unsure about routing near airbags, that is the point where professional fitting is the safer choice.
Keep the cable secure and hidden where possible, but not crushed. Sharp bends and pinched wires can lead to intermittent power loss. Once the cable reaches the socket or hardwire point, leave a little slack near the camera so the connector is not under constant tension.
Installing a rear camera
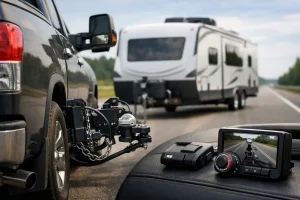
A two-channel dashcam gives extra coverage, which is useful for family cars, company vehicles and anyone who wants protection front and rear. Rear camera fitting is often more involved because the cable usually has to run from the front screen to the rear window through the headlining and trim.
On hatchbacks and estates, the flexible loom area between body and tailgate needs particular care. That section moves every time the boot opens, so the cable must be routed neatly and with enough flexibility to avoid damage. On vans, rear camera placement can vary depending on rear door design and whether visibility is already limited.
The rear camera should sit high enough to capture the road behind without being blocked by headrests, wiper motors or heavily tinted glass. As with the front unit, test the view before you commit to the final position.
Hardwiring a dashcam the right way
Hardwiring sounds simple on paper, but modern vehicles are not always forgiving. A proper hardwire installation usually involves connecting to a switched live, a permanent live and an earth. This allows the dashcam to run during driving and, where supported, switch into parking mode when the ignition is off.
The key point is battery protection. A good hardwire kit should have low-voltage cut-off to stop the dashcam draining the vehicle battery too far. This matters even more on vehicles used infrequently or on short journeys. Without cut-off protection, parking mode can become a battery problem.
You also need the correct fuse type and rating. Guesswork is not good enough here. Tapping into the wrong circuit can cause faults, warning lights or unreliable operation. On vehicles with sensitive electronics, stop-start systems or manufacturer-specific power management, a tidy hardwire job still needs to be technically correct.
For that reason, many drivers decide the camera choice is DIY, but the final wiring is best left to a workshop. That is especially true if you want a clean hidden finish and dependable parking surveillance.
Testing after installation
Once fitted, the dashcam needs more than a quick power-on check. Start the vehicle and confirm the camera records automatically. Check the live view angle, make sure the horizon is level and confirm number plates are readable in daylight.
Then review an actual saved clip. It is surprising how often cameras appear to be working but are not writing files correctly because of card issues or setup errors. If the unit has GPS, parking mode or Wi-Fi, test those functions too.
Pay attention to rattles and trim fit after the installation. If a cable has been tucked badly, you may hear it tapping behind a pillar or roof lining. A proper fit should be discreet and quiet, not something you notice on every journey.
When professional fitting makes sense
If your vehicle has complex electrics, multiple airbags, heated screens, rear tailgate wiring challenges or you simply want the job done neatly, professional installation is often the better value option. The same applies if you use your vehicle for work and cannot afford a camera that cuts out, falls off or drains the battery.
A workshop fitter can advise on camera position, cable routing and whether your vehicle is best suited to plug-in power or hardwiring. That helps avoid the common problems people run into after trying to save time with a rushed installation. For drivers in South Yorkshire who want a tidy, reliable result, Doncaster Towbars can fit dashcams as part of a broader vehicle accessory service.
A dashcam should feel like part of the vehicle, not an afterthought hanging from the windscreen. If you install it carefully, it will do its job quietly in the background until the day you really need the footage.